Best Water Extraction and Drying Techniques to Prevent Mold
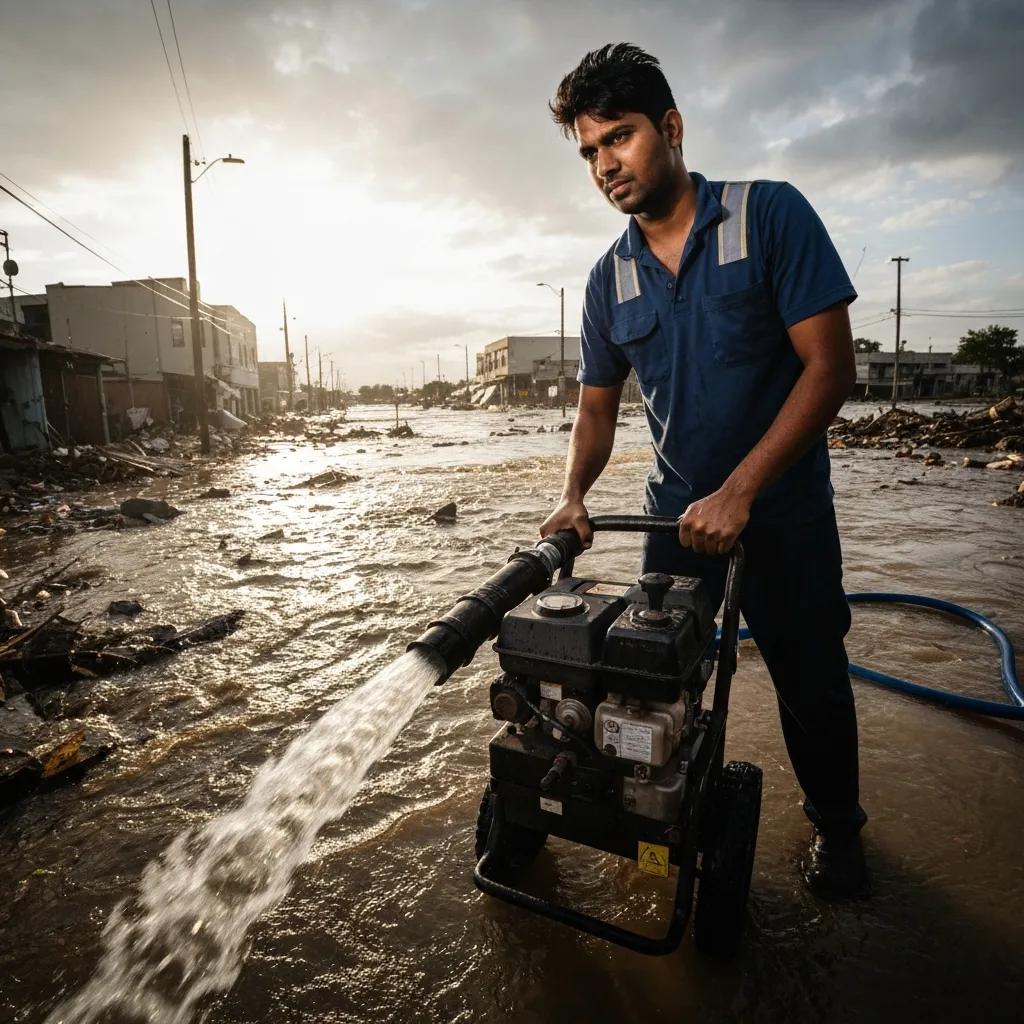
Proper drying uses coordinated extraction, airflow, and humidity control: extractors remove bulk water, air movers accelerate evaporation, and dehumidifiers pull moisture from the air so it can’t re-wick into materials. A consumer wet/dry vacuum works for very small spills, but industrial extractors and high-capacity dehumidifiers are needed for reliable subfloor and wall-cavity drying. Use calibrated moisture meters or infrared scans to confirm drying goals for both visible surfaces and underlying subfloors — surface dryness alone can be deceptive. The correct sequence is extract, ventilate, dehumidify, then monitor to prevent mold and confirm readiness for repairs or replacement.
- Use extractors for bulk water removal and air movers to speed evaporation.
- Deploy dehumidifiers to lower ambient humidity and prevent re-wicking.
- Monitor subfloors and structural components with calibrated moisture meters.
Ongoing monitoring proves drying effectiveness and guides the repair-or-replace decision.
When to Call Professionals for Mold Remediation After Water Damage
Bring in professionals when contamination level, affected area, or health risks exceed what’s safe or practical to DIY. Common triggers are large affected areas, contaminated water (sewage or flood), visible mold beyond small patches, and structural or subfloor damage. Professional teams offer systematic inspection, containment, removal, drying, and clearance testing to industry standards while protecting occupants. Costs vary by square footage, water category (clean vs. contaminated), access difficulty, and repair needs — get written estimates and scopes for insurance claims and decision-making. If you see any trigger conditions, schedule a professional assessment to reduce long-term risk and restore safe indoor air.
Below are typical conditions that call for professional help and the common actions professionals take.
| Condition | Severity Indicator | Recommended Professional Action |
|---|
| Visible mold >10 sq ft | Widespread surface growth | Full inspection, containment, removal, and clearance testing |
| Contaminated water (sewage/flood) | Foul odors, discoloration | Immediate professional extraction, demolition of affected materials, sanitization |
| Structural/subfloor damage | Soft spots, sagging, delamination | Structural assessment, remove damaged layers, subfloor repair or replacement |
This table clarifies common trigger points and the professional steps typically required. The next section explains how BK Flooring Services coordinates remediation with replacement work.
BK Flooring’s Mold Remediation Process
At BK Flooring Services, Inc. we combine flooring expertise with remediation capabilities. We start with a professional inspection and a documented scope that identifies affected materials, moisture levels, and contamination. Our work typically includes containment to limit cross-contamination, targeted removal of mold-impacted flooring and underlayment when needed, coordinated subfloor drying and moisture testing, and final verification before installing replacement materials. If replacement is the best option, we recommend suitable upgrades for water-prone areas and manage the project from demolition through new installation to simplify recovery. Homeowners in Marietta and the Atlanta metro area can request an on-site appraisal and detailed options directly from us.
Our integrated approach reduces handoffs between contractors and helps move projects from mitigation to finished flooring faster while keeping mold containment and moisture control front and center.
How Mold Removal Costs Vary
Cost depends on area size, contamination severity, water source classification, accessibility, and whether demolition and subfloor replacement are required. Clean-water incidents handled quickly typically cost less — limited to extraction, drying, and minor repairs — while sewage or flood water usually means removing porous materials and more intensive sanitization. Other cost factors include moisture mapping, clearance testing, HVAC cleaning, and structural repairs. Get multiple written estimates and check insurance coverage; documenting damage immediately helps vendors provide accurate scopes and supports claims.
- Larger areas and difficult access raise labor and time costs.
- Water classification (clean vs. contaminated) strongly affects demolition needs.
- Clearance testing and subfloor repairs add to the overall expense.
Knowing these variables helps homeowners weigh repair versus replacement and choose the right remediation partner.
Deciding Whether to Repair or Replace Water-Damaged Flooring
Decisions hinge on water type, response time, visible structural damage, and lingering mold or odors that point to hidden contamination. Repairs are often possible when exposure involved clean water, drying happened within 24–48 hours, and the subfloor is intact. Replacement is generally needed for sewage contamination, widespread delamination or cupping, soaked insulation or padding, persistent musty smells after drying, or documented subfloor rot. A methodical inspection of finish materials, underlayment, and subfloor — together with moisture testing — produces a defensible decision and helps avoid repeat problems.
Below is a compact comparison to help identify clear thresholds that favor repair or replacement.
| Flooring Component | Damage Indicator | Recommended Action and Notes |
|---|
| Carpet & padding | Saturation + musty odor | Replace carpet and padding; inspect and remediate subfloor if mold is present |
| Solid hardwood | Cupping, warping, buckling | Replace if widespread; limited repairs possible if damage is localized and subfloor is sound |
| Laminate and engineered wood | Delamination, swelling | Replace affected planks, inspect underlayment, and consider water-resistant alternatives |
This practical table links components to decision rules so you can determine when replacement is the prudent choice. The section below lists clear signs that usually require replacement rather than repair.
Signs That Flooring Needs Replacement
Replace flooring when you see widespread cupping or buckling in hardwood, delamination across multiple laminate boards, saturated carpet and padding with persistent odor, or visible subfloor rot or structural compromise. If water exposure involved sewage or floodwater, porous materials are usually unsalvageable and must be removed for health reasons. Persistent elevated moisture readings in the subfloor after drying attempts indicate hidden wet pockets that will continue to support mold if not removed. Use visual, smell, and moisture-test data together to make a reliable replacement decision.
- Widespread buckling, delamination, or structural compromise calls for replacement.
- Sewage– or flood-contaminated materials should be removed for health and safety.
- Persistent high moisture in subfloors after drying indicates hidden failure and likely replacement.
These diagnostic rules help homeowners avoid repeated repairs and choose durable, moisture-appropriate replacements.
Flooring Types Most Vulnerable to Water Damage and Mold
Carpet with padding and traditional laminate are among the most vulnerable because they absorb and hold moisture and trap organic debris that feeds mold. Solid hardwood is prone to swelling, cupping, and warping after extended moisture exposure; limited repairs may be possible if the subfloor is sound. Engineered wood resists moisture better than solid hardwood but can still suffer edge swelling or adhesive failure if flooded. Understanding each material’s vulnerabilities guides replacement choices and whether to upgrade to waterproof alternatives that cut future mold risk.
- Carpet and padding: high moisture retention and hard to dry fully.
- Traditional laminate: delaminates and traps moisture at seams.
- Solid hardwood: warps and cups; may need plank replacement or a full refinish.
Choosing water-resistant or waterproof options in high-risk rooms reduces long-term maintenance and mold exposure.
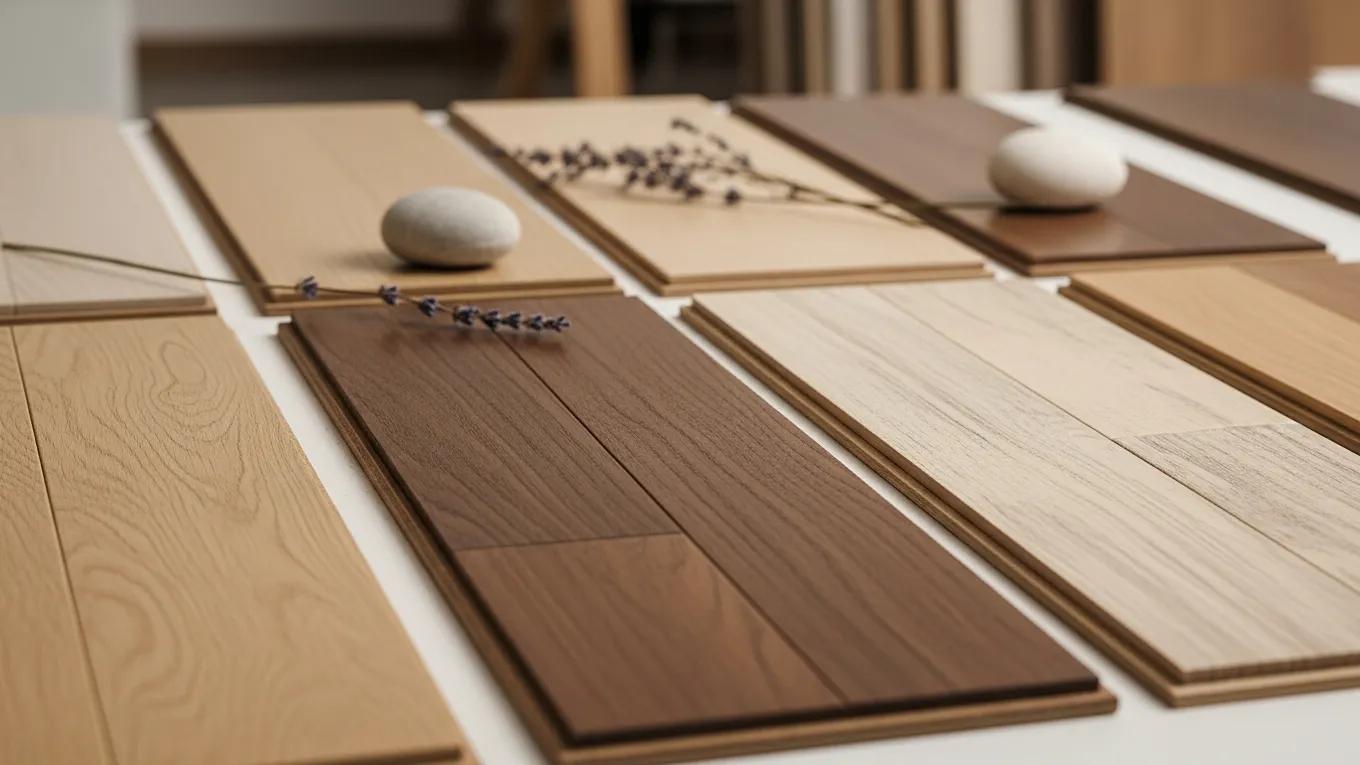
Best Water-Resistant Flooring Options to Prevent Mold
Picking floors that resist moisture lowers mold risk by minimizing water ingress and making drying and cleaning easier. Top choices include Luxury Vinyl Plank (LVP), porcelain tile, and engineered wood with waterproof cores. Each balances waterproofing, installation complexity, upkeep, and look. For kitchens, basements, and mudrooms, waterproof materials significantly reduce the chance of mold forming under floor layers. Proper subfloor prep — moisture testing, installing a moisture barrier, and using the right underlayment — complements the finish and prevents water from reaching structural components. The table below compares common choices by waterproofing strength, cost, installation complexity, and maintenance needs.
| Material | Waterproofing Strength | Typical Cost Range | Installation Complexity |
|---|
| Luxury Vinyl Plank (LVP) | High (waterproof cores available) | Moderate | Moderate; floating or fully adhered installations |
| Porcelain tile | Very high (non-porous) | Moderate–High | Higher; requires mortar and grout sealing |
| Engineered wood (water-resistant) | Moderate | Moderate–High | Moderate; depends on core technology and adhesive |
This comparison shows why LVP and porcelain tile often perform best in wet-prone areas and helps guide material selection. The sections below explain why LVP and tile are particularly effective.
Why Luxury Vinyl Plank Works Well in Water-Prone Areas
Luxury Vinyl Plank (LVP) often uses waterproof cores like WPC or SPC and a tough wear layer that resists liquid penetration, making it a strong choice for kitchens, basements, and laundry rooms. It mimics hardwood but provides a non-porous surface that’s easy to clean and less likely to hold mold-friendly residues. Installation style — floating click systems or fully adhered applications — affects how seams respond to moisture, and correct underlayment and edge sealing help prevent water from reaching the subfloor. LVP also allows plank-level replacement for localized damage, which can cut repair costs down the road.
- Waterproof cores prevent liquid from passing through the plank.
- Durable wear layers simplify cleaning and sanitation.
- Plank-level replacement limits scope and cost for localized damage.
These features make LVP a practical, attractive option for wet environments.
Benefits of Ceramic and Porcelain Tile for Mold Prevention
Ceramic — and especially porcelain — tile offers a non-porous surface that resists water and is easy to sanitize, reducing surface mold risk and allergen reservoirs. Properly installed tile with sealed grout prevents water from migrating into the subfloor; maintaining grout sealant is a small ongoing task that preserves performance. Tile is dimensionally stable and resists warping or swelling, making it a durable choice for bathrooms, kitchens, and entryways where water is common. Although tile installation requires skill and careful subfloor prep, the long lifecycle and cleanability make it a strong mold-prevention choice.
- Porcelain tile is highly water-resistant and easy to clean.
- Sealed grout prevents water from reaching subfloor assemblies.
- Tile resists dimensional changes, reducing mold-friendly materials.
When paired with the right underlayment and grout sealing, tile provides a resilient, low-maintenance finish for wet-prone rooms.
How Waterproof Flooring Protects Your Home and Investment Over Time
Waterproof and water-resistant floors safeguard structure and indoor air quality by blocking moisture ingress, reducing the chance of mold reservoirs, and cutting the frequency of costly repairs. Over time, these materials often deliver lower lifecycle costs in wet-prone spaces because they resist warping, delamination, and biological breakdown that force replacements. Routine maintenance — sealing grout, controlling humidity, and promptly addressing spills — keeps waterproof floors performing and helps preserve indoor air quality. Choosing the right material and ensuring professional installation and subfloor prep maximize longevity and support resale value.
- Fewer repairs over time: Waterproof materials avoid many water-related failures that lead to replacement.
- Healthier indoor air: Non-porous surfaces reduce mold reservoirs and allergen buildup.
- Better long-term value: Durability and lower maintenance translate to savings over the life of the floor.
These benefits depend on correct installation and regular maintenance, described below, to keep floors protecting your home.
Maintenance and Durability Advantages of Waterproof Flooring
Maintenance is simple: sweep and mop to remove debris, dry spills promptly, and check seams and grout periodically for breaches that could let water in. Waterproof floors resist cupping, warping, and delamination that affect less-resistant materials, lowering the chance of moisture-driven structural repairs. Wear is often surface-level on LVP or tile and can be handled with plank replacement or grout repair rather than full replacement. Proactive humidity control and occasional professional cleaning keep finishes working and help catch early signs of moisture intrusion before mold becomes a problem.
- Routine cleaning prevents residue that supports mold.
- Resistance to common water failures preserves structural integrity.
- Localized repairs are usually possible, reducing lifecycle replacement costs.
Consistent maintenance practices maximize the long-term value of waterproof flooring investments.
How Water-Resistant Flooring Supports Indoor Air Quality and Mold Prevention
Non-porous flooring reduces places where mold can take hold by limiting trapped moisture and organic residues, cutting long-term reservoirs for spores and allergens that harm indoor air. Pair water-resistant flooring with humidity control — generally keeping indoor relative humidity between 30–50% — and regular inspections of seams, edges, and subfloor moisture readings for a layered defense against mold. Periodic checks after major water events verify that the building envelope and floor systems stay dry. Together these steps lower occupant exposure to mold-related irritants and support healthier indoor environments.
- Water-resistant surfaces reduce mold habitats and simplify cleaning.
- Humidity control and monitoring complement material choices for IAQ protection.
- Regular inspections catch breaches before they lead to hidden mold growth.
If you want professional help, BK Flooring Services, Inc. offers flooring selection, moisture testing, and installation services tailored to water-prone areas. We install hardwood, laminate, LVP, tile, and carpet and provide sanding, refinishing, moving, and professional cleaning. When replacement is required, we can recommend upgrades like LVP or porcelain tile that perform well in humid or water-exposed spaces and coordinate demolition, subfloor drying, and new installation to restore both safety and appearance. Residents in Marietta, Alpharetta, and Atlanta can contact BK Flooring Services for an assessment and estimate that aligns remediation and replacement with long-term mold prevention.
Frequently Asked Questions
What are the long-term health effects of mold exposure?
Long-term mold exposure can cause or worsen respiratory issues, especially for people with asthma, allergies, or weakened immune systems. Common symptoms include chronic cough, nasal congestion, eye irritation, skin rashes, and in some cases more serious respiratory infections. Prolonged exposure can also trigger conditions like hypersensitivity pneumonitis in susceptible individuals. Prompt remediation and moisture control are important to reduce these risks and protect your household.
How can I detect hidden mold in my home?
Hidden mold can be hard to spot. Look for musty odors, water stains, or discoloration on walls, ceilings, and baseboards. Check areas prone to dampness and run moisture tests where you suspect problems. If you suspect hidden mold, hire a professional inspector who can use moisture meters and thermal imaging to locate concealed growth and assess conditions accurately.
What should I do if I find mold in my home?
If you find mold, protect yourself first — gloves and an N95-style mask are a good start. Contain the area to prevent spores from spreading. Small, isolated patches can sometimes be cleaned with detergent and water, but larger infestations, contaminated water events, or mold in HVAC systems usually require professional remediation. Always address the water source as well to prevent recurrence.
How can I prevent mold after water damage?
Prevent mold by removing standing water and drying affected areas within 24–48 hours whenever possible. Use dehumidifiers and fans to speed drying, and improve ventilation in bathrooms, kitchens, and laundry areas. Keep indoor humidity between 30–50%, inspect for leaks regularly, and act fast on any water intrusion to reduce mold risk.
What signs mean my flooring needs immediate replacement?
Immediate replacement is likely if you see visible mold growth, persistent musty odors, severe warping or buckling, or soft spots that indicate structural damage. Flooring exposed to sewage or floodwater generally needs removal for health reasons. If moisture readings stay high after drying, hidden damage may exist and replacement could be necessary.
Any maintenance tips for water-resistant flooring?
Yes. Sweep and mop regularly, dry spills quickly, and inspect seams and grout lines for cracks or gaps. Maintain sealed grout where applicable, and consider periodic professional cleaning to preserve the finish. These simple steps help your water-resistant floor continue preventing mold effectively.
How important is humidity control for mold prevention?
Humidity control is essential. Mold thrives in damp conditions, so keeping indoor relative humidity between 30–50% helps limit growth. Use dehumidifiers in basements and other moisture-prone areas, run exhaust fans in baths and kitchens, and monitor humidity after water events to keep your home healthy.
Conclusion
Preventing and remediating mold after floor water damage protects your home’s structure and the people who live in it. By understanding what causes water damage, acting quickly to extract and dry, and choosing appropriate, water-resistant flooring when replacing damaged areas, homeowners can greatly reduce mold risk and long-term costs. Luxury Vinyl Plank and porcelain tile are strong choices for wet-prone rooms, but correct subfloor prep and professional installation matter just as much. For expert guidance and a tailored plan, contact BK Flooring Services — we’ll help you restore your floors and keep your home mold-free.